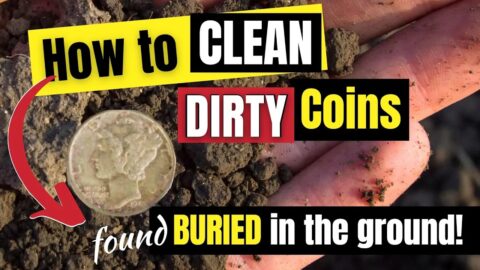
Wondering how to clean BURIED COINS found with a metal detector? See how to CLEAN COINS found in the dirt WITHOUT damaging them!
Now you can start cleaning coins found metal detecting yourself at home! NOTE: All DIY methods of coin cleaning will damage the coins to some small degree. This video is for demonstration purposes only on coins that are only worth face value.
============================
⚡TIMESTAMPS FROM THE VIDEO⚡
00:00 – Tips For Cleaning Coins Found Metal Detecting
00:25 – Cleaning Coins Can Ruin Them If You’re Not Careful
01:06 – Coins Found w/Metal Detector: 2 Pennies, 1 Nickel
01:28 – 1: Safest Way To Clean Metal Detector Coins
02:23 – 2: How To Clean Corroded Coins – Metal Detecting
04:44 – 3: How To Find A Professional To Clean Your Coins
05:44 – 4: Other DIY Ways To Clean Coins At Home Yourself
06:39 – SUMMARY: How To Clean Buried Coins
============================
TRANSCRIPT:
Hello everybody! This is Josh with The Fun Times Guide to Coins. We get a lot of questions about how to clean coins that are found while metal detecting. I have here 3 coins that were encased in dirt in my backyard and they really don’t look all that bad out of the ground. But, I do want to show just for the sake of cleaning such coins how I would do that safely.
Those who follow my videos here know that I’m NOT a big fan of cleaning coins because of the fact that cleaning coins can actually ruin them in the end. So it’s really a matter of what’s the importance to you cleaning your coins. Is it so you can see the details or identify it? Those are usually the cases where I would clean a coin found metal detecting or whatever. But in the case of those who want to clean coins to brighten their appearance or make them look new… That never really ends well – because you can’t make an old coin look new without damaging it and really just putting off a lot of collectors who want the originality of the coin.
But, having said that, we’ve got here a 1964 Denver Lincoln cent, a 1971 Lincoln cent, and a 1997 Philadelphia Jefferson nickel. Again, these are not that bad. But what I will do just to demonstrate how I would go about cleaning coins found the dirt or picked up while metal detecting… I would start off with the most conservative method. And that’s just to use running water to remove any surface debris – which there really isn’t ANY on this one at all. There was some dirt kind of stuck on the edges when I took this coin out. But it looks fine to me – so really rinsing it is just going to go ahead and just take off any minuscule debris that might still be on there.
Let’s go ahead and pat dry this with my clean soft towel. Again, you never rub a coin with a towel – because the rubbing can actually impart striations on the surface and cause irreparable damage. We’ve got here the Jefferson nickel. Let’s go ahead and… Yeah, it still has some light dirt on it. I did try to slough off the dirt when I took them out of the dirt. Notice the drain here… The stopper is UP – so coins will not go down. Don’t want coins on the drain! Let’s go ahead and pat dry this one.
Now this other Lincoln cent has an interesting little bit of extra challenge to it. You’ll see here… Yeah, that definitely has… Well okay, the crud is still there for sure. If you notice though… like look up there by the maybe the “U” of trust in the motto “In God We Trust”. That little green spot is called verdigris. And that actually is a kind of corrosion that’s often associated with old copper coins found in the dirt. So, how do you address that? Well let me take off the surface debris first. Then we’ll go ahead and talk about the verdigris in a moment here.
First release the crud off the coin. Okay, so verdigris… that’s a challenge. Because oftentimes with signs of verdigris (or when there is verdigris on the coin) there is damage below the verdigris. So what’s happening is oxides are basically eating away at this coin. Copper, for those of you who are not chemists (so that includes me, but I know this from just coin collecting)… copper is a highly reactive metal. Anything in its environment will affect the way it looks – and will also affect the metal’s integrity. And in this case here… the verdigris… yeah that is verdigris… it’s not going to come off with the water. It has probably eaten into the surface. So there is damage that we cannot repair already. And plus, this coin has some nicks and scratches anyway that will mar its collectible value. And being a worn modern Lincoln cent, it really wouldn’t have much numismatic premium. Although it is worth about right now 3 to 4 cents for its copper value. Because metal prices have been going up the last several years.
But how do you remove verdigris? Well, that’s not an easy task. Because the problem is anything you’re going to do to take that green stuff off (the verdigris) could not just damage the metal below it but also around it. I’ve seen some folks who mentioned using baking soda to try to scrub off the verdigris. Engine degreaser has also been mentioned as a possible solution. There are chemicals on the numismatic market that are designed for removing verdigris – which is a big problem with old Roman coins and ancient coins. (Copper coins that are found underground that have been there for, you know, millennia essentially.) But what I suggest doing… And again, I’m taking a very conservative approach here with this. I would suggest those who find coins that have verdigris to (if they can’t remove the damage or the signs of damage with water or acetone – which is another safe method in terms of the coin safety for removing old debris and adhesives and such).
Although do bear in mind that you want to use safety precautions when you use acetone. It’s a very dangerous chemical to humans. I would suggest submitting this kind of coin to a numismatic conservator (a conservation company). They are skilled professionals who know how to remove verdigris and other contaminants that are on a coin’s surface. They never guarantee results. And I wouldn’t suggest that if you do this you’re going to get a promise that the coin will look new again. It’s not that’s the intention of such a service. But they could be able to approach the verdigris in a way that will not (or may not) damage the surface. You might consider – if you’re wanting to risk it – you could try some of the at-home methods first for removing verdigris from the coin. I would just take it right to the conservation service.
Now in this case here, a coin of this value would not be worth submitting to such a service – because they do charge some premiums. Not just the flat base fee, but also a premium on top of that based on the coin’s value. And again, there’s no promise they can actually remove verdigris. But it’s worth a shot for more valuable coins that have such damage. So this is about as far as I’m going to go in this case with this coin. Even though it’s basically just a coin I would spend – as just regular money. It’s an example of a very common issue that we face with coins that are found metal detecting – and that’s verdigris.
So I hope this video at least gives you some direction on what to do if you find coins that have issues like this. But at least for these 2 coins anyway, a little bit of of a bath in the water did just fine. It did wonders for them. I mean it has a little bit of surface staining here (patina). That wasn’t the goal. I wasn’t trying to remove that per se. My goal is just to get these coins physically clean – so I can be able to use them as pocket change. So, thank you for watching the video. I hope it’s been helpful to you. If you like it, please let us know. Leave us a comment. And be sure to subscribe to our channel. Hope you have a great day!

